|
Dial-up Access Support
Windows 95/98 Configuration
Windows 2000 Configuration
Windows 95/98 Configuration
- Click the Start button point to Settings and choose Control Panel.
- Click the Network icon.
- Verify that Dial-up adapter and the TCP/IP protocol are installed.
- If they are not follow the following steps, If they are you may skip to #26.
- Click the Add button.
- Select the Protocol component.
- Click the Add button.
- Click Microsoft under Manufacturers.
- Click TCP/IP under Network Protocols.
- Click the OK button.
- Click the Add button.
- Select the Adapter component.
- Click the Add button.
- Select Microsoft under Manufacturers.
- Click the Dial-up Adapter on the right.
- Click the OK button.
- You should now have Dial-Up Adapter, and TCP/IP.
- Click the Dial-Up Adapter Component.
- Click the Properties button.
- Click the Advanced tab.
- Click Use IPX header compression.
- In the Value field, click on the down arrow and select No.
- Click the OK button.
- When Windows 95/98 prompts you to restart the computer, click OK.
- Wait for the computer to restart.
This may take a few minutes.
- Double-click My Computer icon.
- Double-click the Dial-Up Networking icon.
- Double-click the Make New Connection icon.
- Under Type a name for the computer you are dialing type SelectNet.
- Click the Configure button.
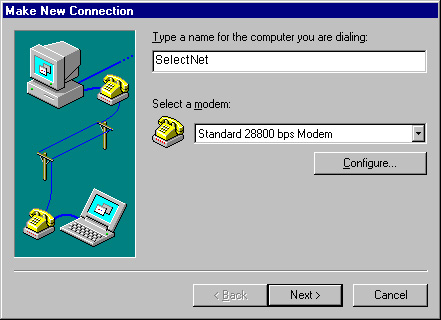
- Check that the Maximum speed setting is correct for your modem (for 28.8 modems use 38400, for 56.6 modems use 115200.)
- Make sure that Only connect at this speed is not checked. Click OK.
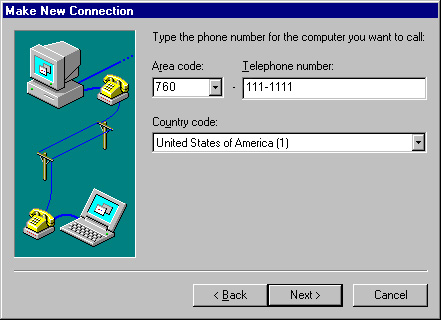
- Click the Next button.
- Determine which access number (POP) that is local for you.
- Type the area code and telephone numbers in the appropraite fields.
- Click the Next button.
- Click the Finish button.

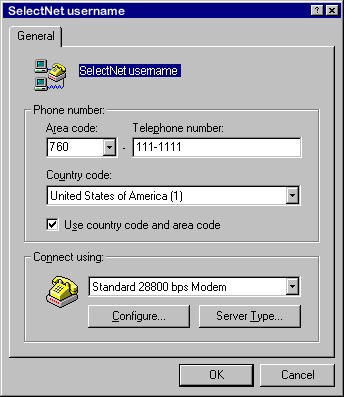
- Click the SelectNet icon.
- Click File from the menu bar.
- Click Properties.
- Click the Server Type button.
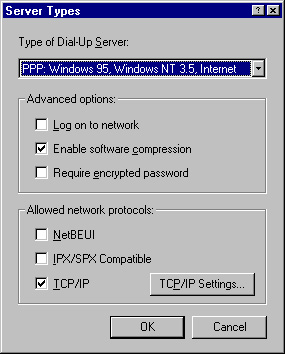
- Uncheck Log on to network.
- Check Enable software compression.
- Uncheck Require encrypted password.
- Uncheck NetBEUI.
- Uncheck IPX/SPX Compatible.
- Check TCP/IP.
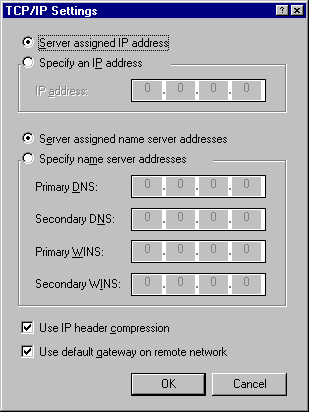
- Click the TCP/IP Settings button.
- Select Server assigned IP address.
- Select Server assigned name server addresses.
- Click the OK button.
- Click OK again.
- Click OK one more time.
You have successfully configured Windows 95/98 to connect to the Internet.
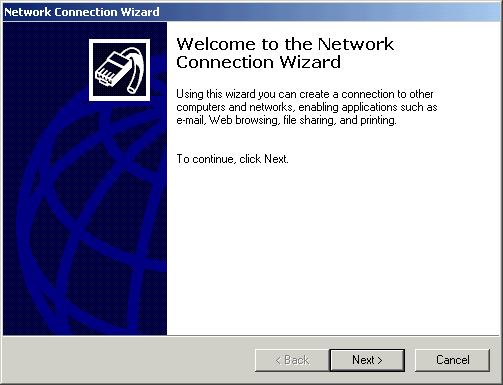
Windows 2000 Configuration
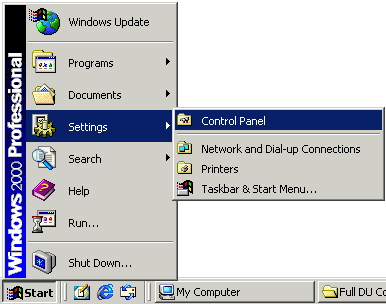
- Click the Start button, click Settings,
and choose Control Panel.
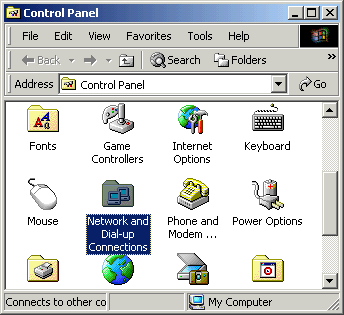
- Double-click the Network and Dial-up Connections icon.
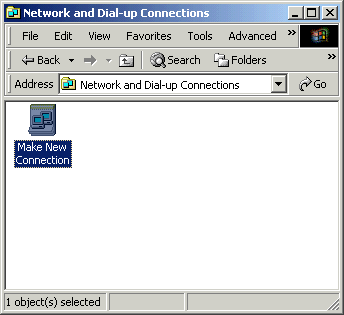
- Double-click the Make New Connection icon.
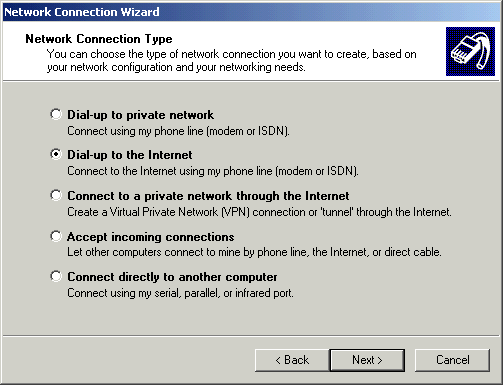
- Click the Next button.
- Select Dial-up to the Internet.
- Click the Next button.
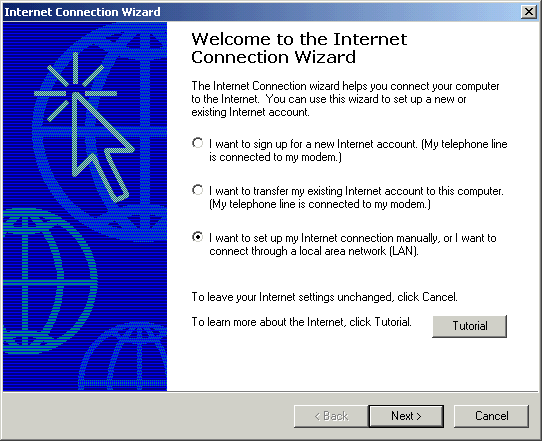
- Select I want to set up my Internet connection manually, or I want to connect through a local area network (LAN).
- Click the Next button.
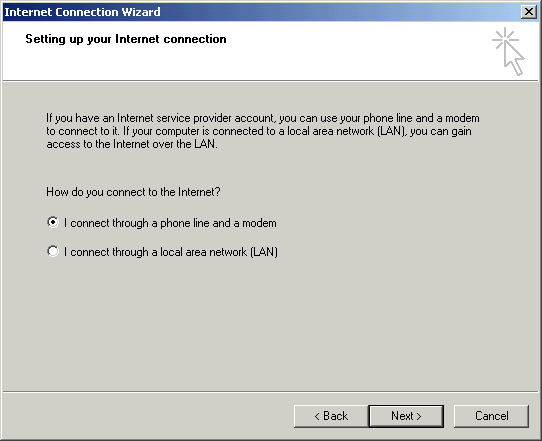
- Select I connect through a phone line and a modem.
- Click the Next button.
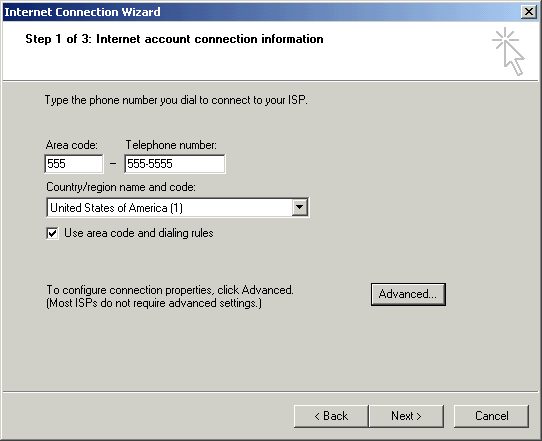
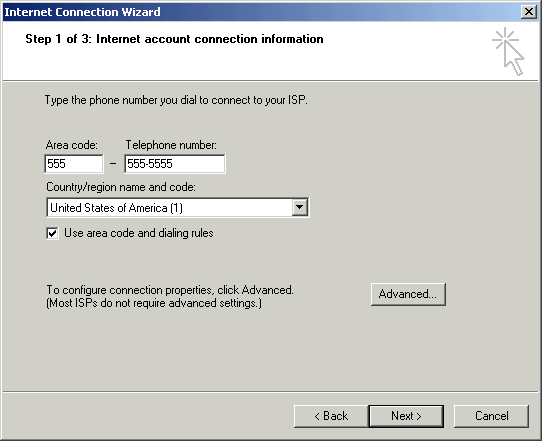
- In the Area Code field, type the area code of your local access number.
- In the Telephone number field, type your local access number.
- Click the Advanced button.
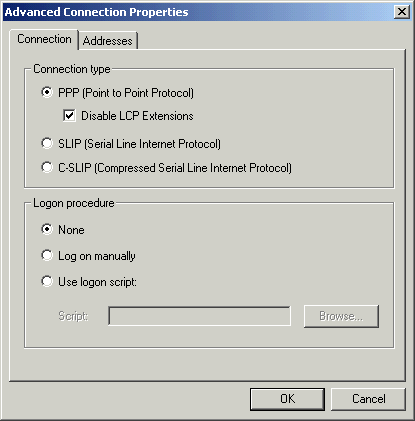
- Click on the Connection tab.
- Click the PPP (Point to Point Protocol) radio button in the Connection type area.
- Check the box next to Disable LCP Extensions.
- Click the None radio button in the Logon procedure area.
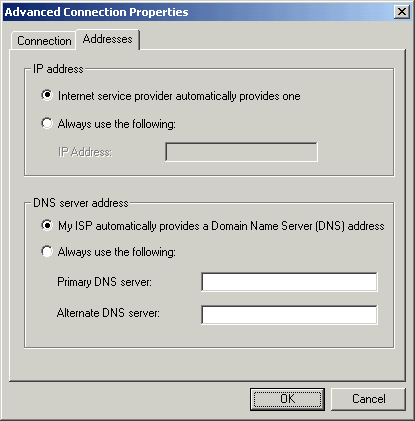
- Click on the Addresses tab.
- Click the My ISP automatically provides a Domain Name Server (DNS) address radio button in the DNS server address area.
- Click the OK button.
- Click the Next button.
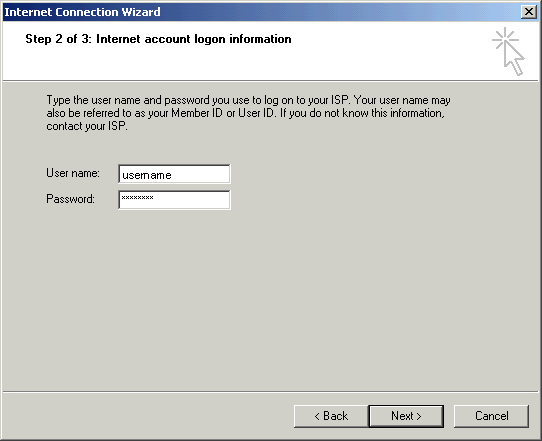
- In the User name field, type your username.
- In the Password field, type your password.
- Click the Next button.
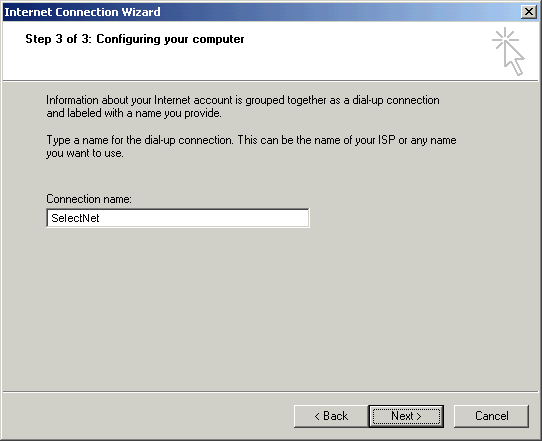
- In the Connection Name field, type your domain name (i.e. SelectNet).
- Click the Next button.
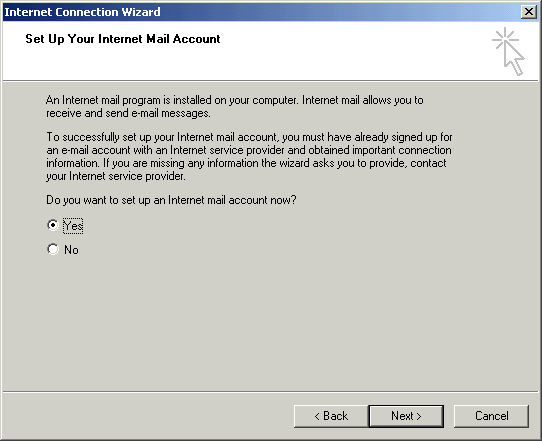
- Click the Yes radio button in the Do you want to set up an Internet mail account now area.
- Click the Next button.
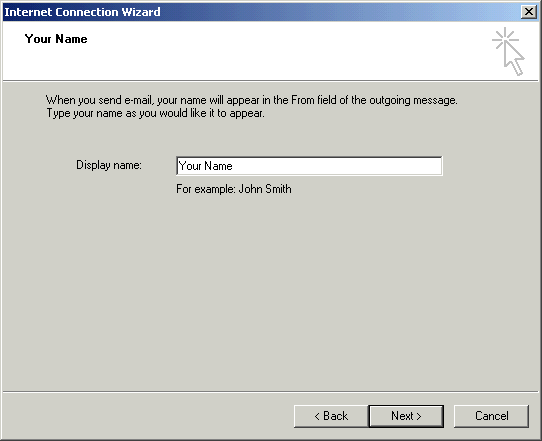
- In the Display Name field, type your name.
-
Click the Next button.
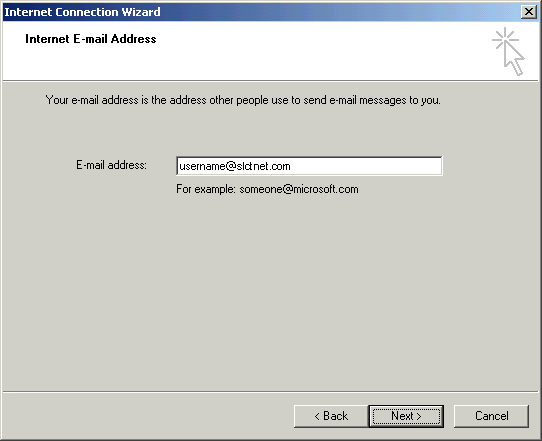
- In the E-mail address field, type your email address.
-
Click the Next button.
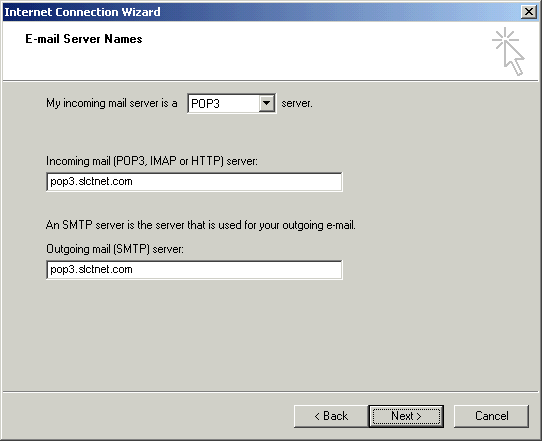
-
Click the down arrow on the My incoming mail server is a __ server drop-down list and choose POP3.
- In the Incoming mail server field, type the POP3 mail server name specific to your domain.
- In the Outgoing mail server field, type the SMTP mail server name specific to your domain.
-
Click the Next button.
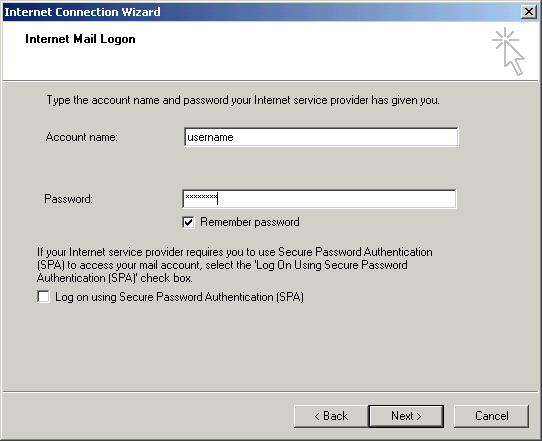
- In the Account name field, type your username.
- In the Password field, type your password.
- Check the box next to Remember passwordif you would like to have your password saved.
-
Click the Next button.
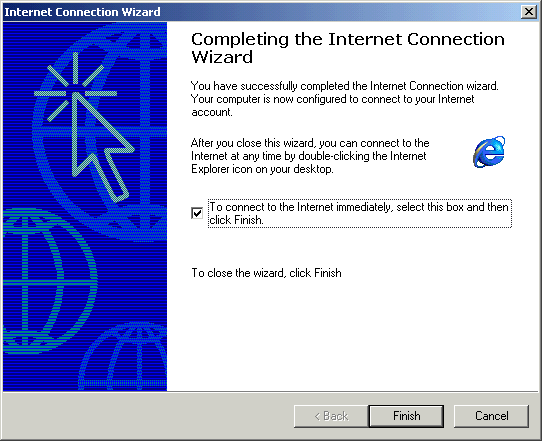
- Check the box next to To connect to the Internet immediately...if you would like to connect right away to the Internet.
-
Click the Finish button.
You have successfully configured Windows 2000 to connect to the Internet.
|
Legal | Privacy | Contact Us
Copyright© 1995-2022 SelectNet Internet Services. All rights reserved.
Services, prices, and terms subject to change without notice.
|
|
|

